These documents will be related to use of NAVUSerPassword with NAV 2013 R2 Windows Client and Web Client.
Follow Step By Step.
PART-1. Create a Security Certificate.
Pre-Requisites –
1. MMC.exe.
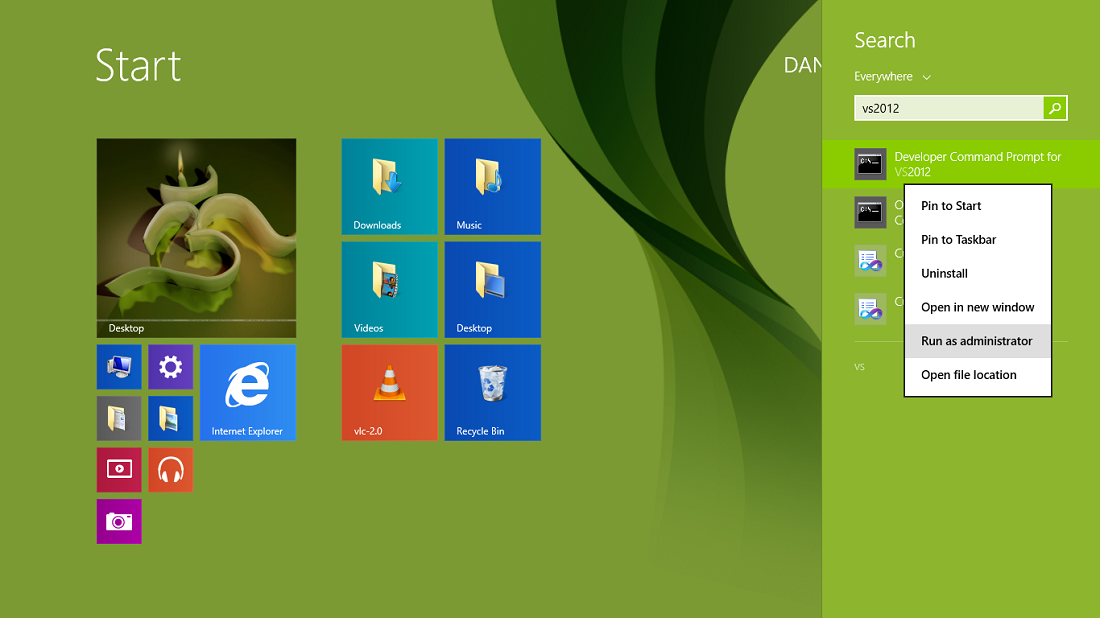
2. Makecert.exe utility (installed with Microsoft Visual Studio).
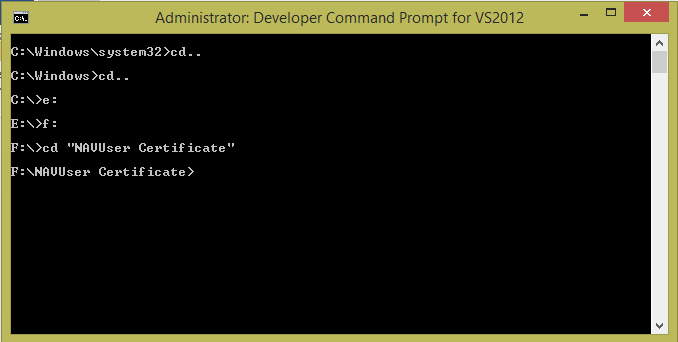
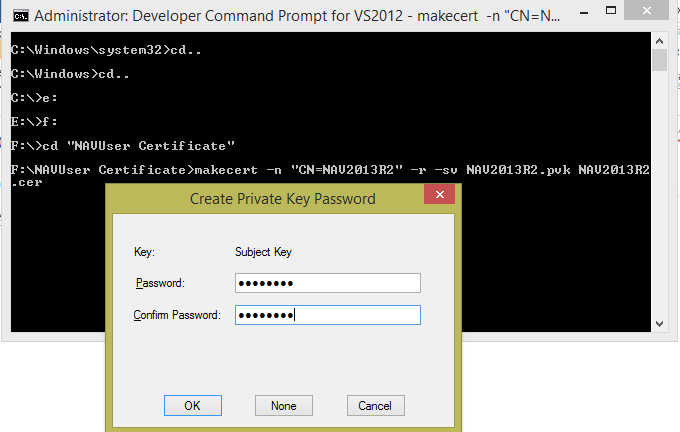
To Store all the files which are required I will create a folder in my E Drive called NAVUser Certificate.

makecert -n “CN=NAV2013R2” -r -sv NAV2013R2.pvk NAV2013R2.cer
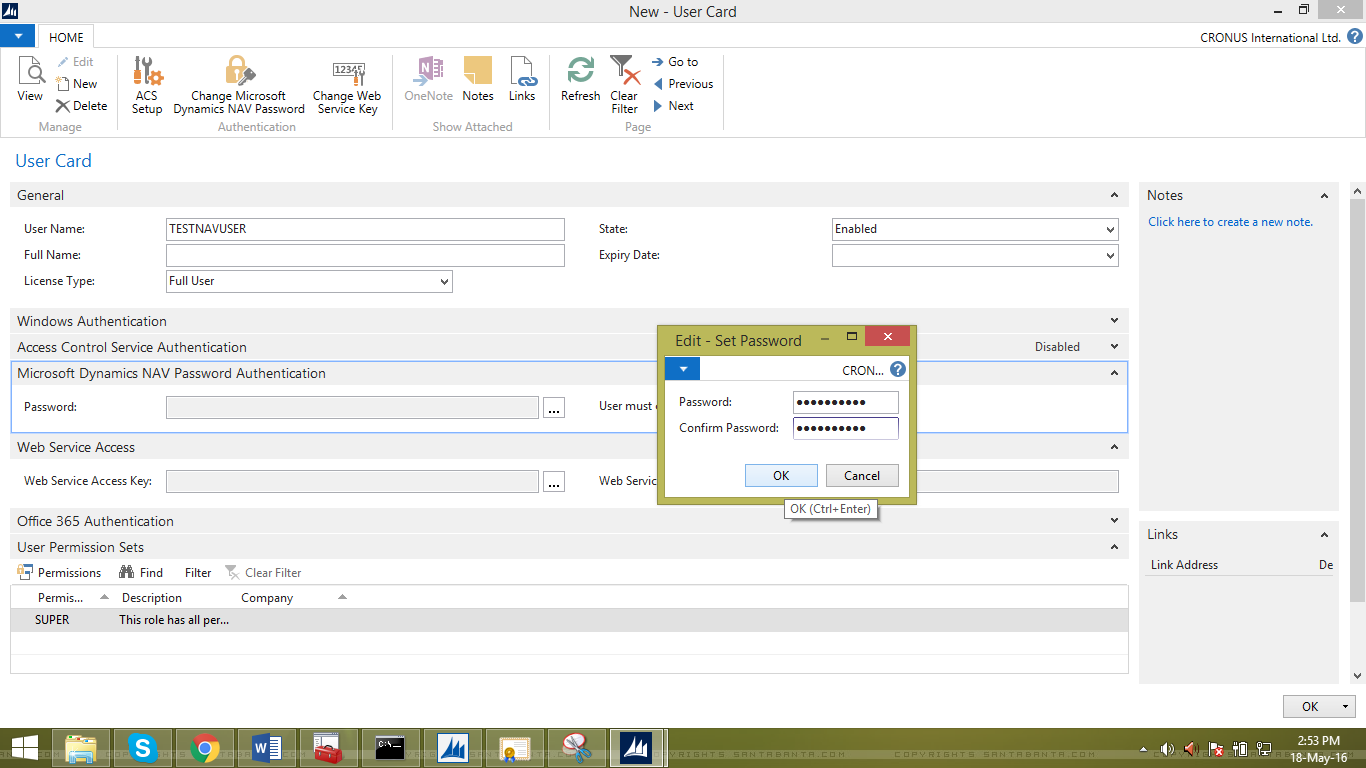
4.When you are prompted, enter a password. You need this password to create the service certificate.

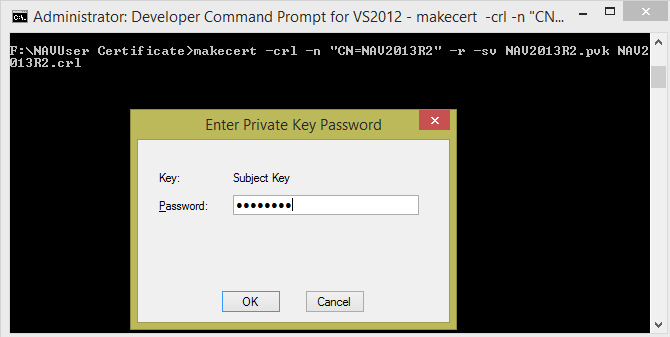
makecert -crl -n “CN=NAV2013R2” -r -sv NAV2013R2.pvk NAV2013R2.crl

PART-2 :- Installation of Security Certificates.
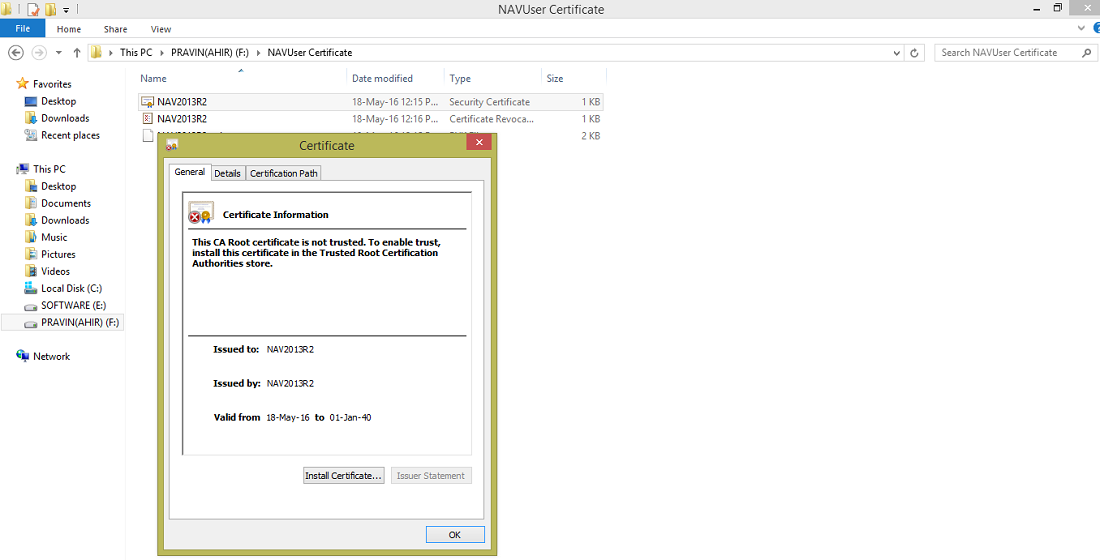
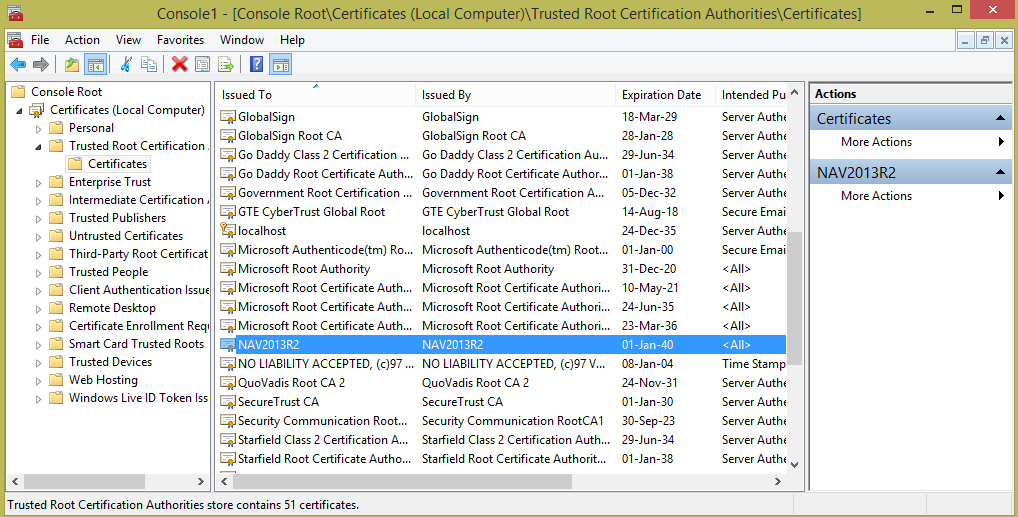
INSTALL CERTIFICATE –
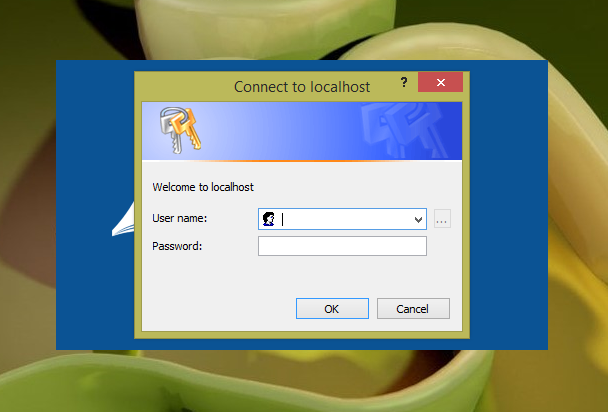
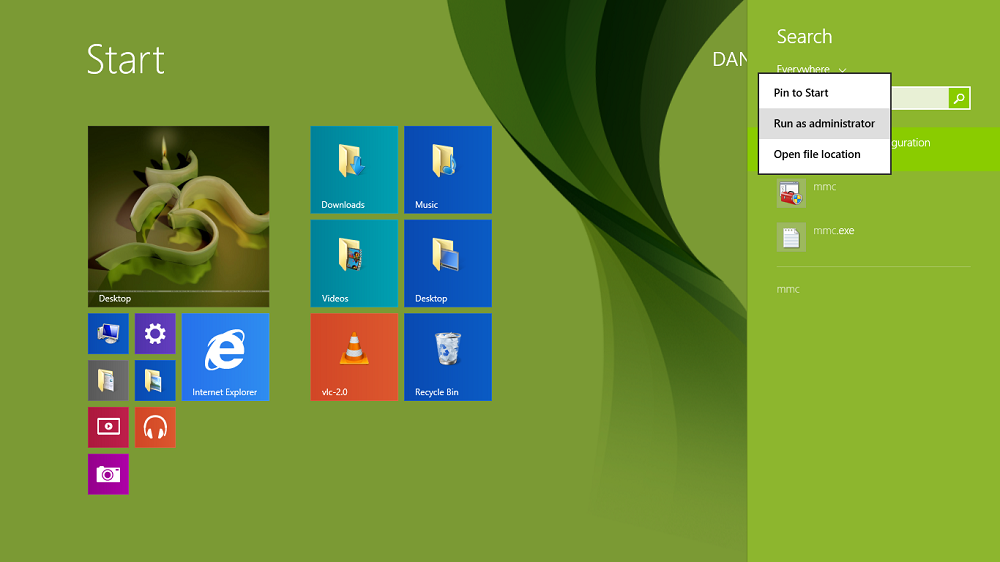
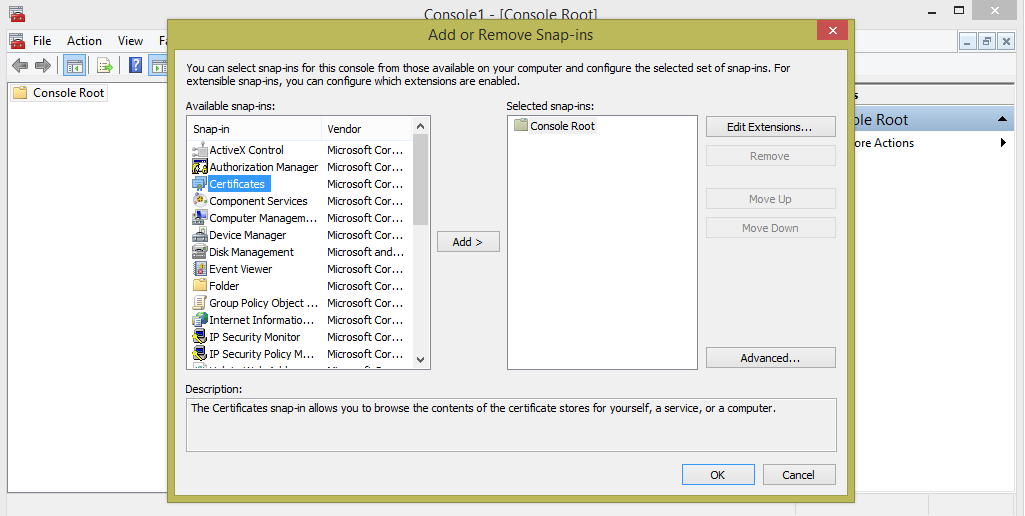
12. Open Mmc.exe from RUN menu.

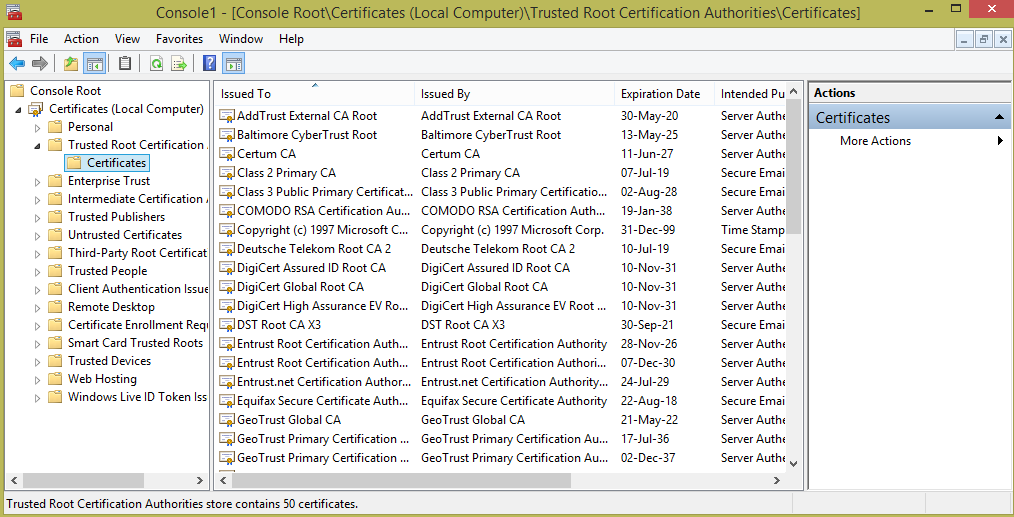
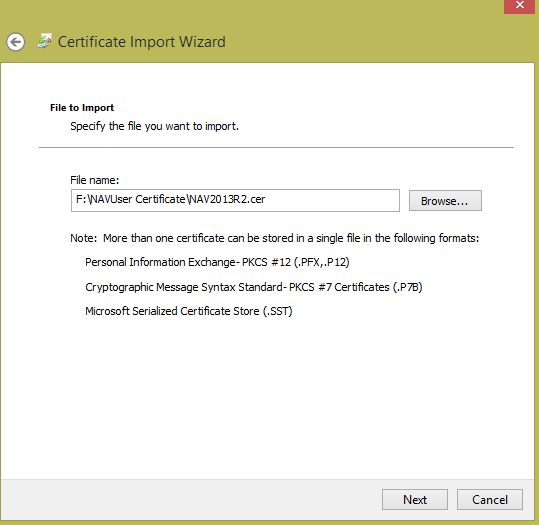
Locate the file in your folder.
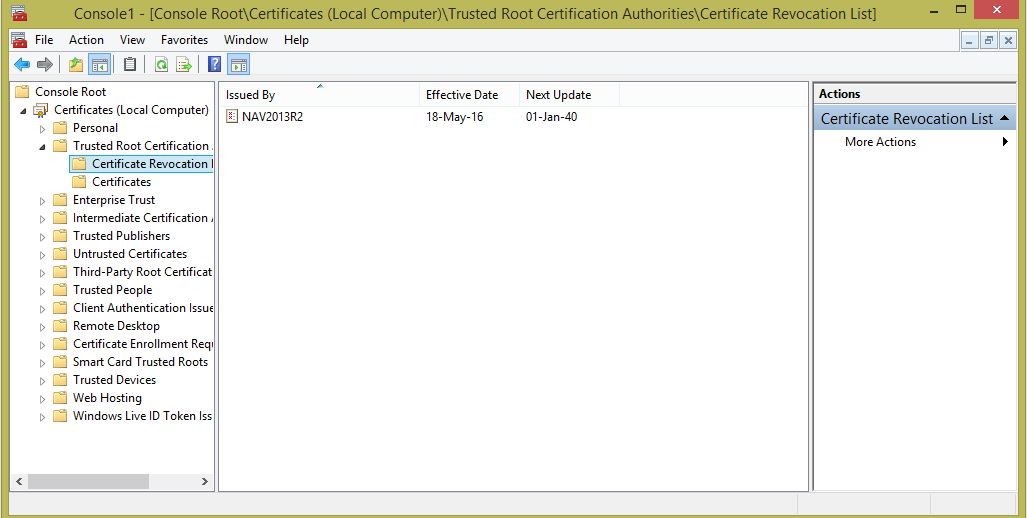
INSTALL REVOCATION LIST –
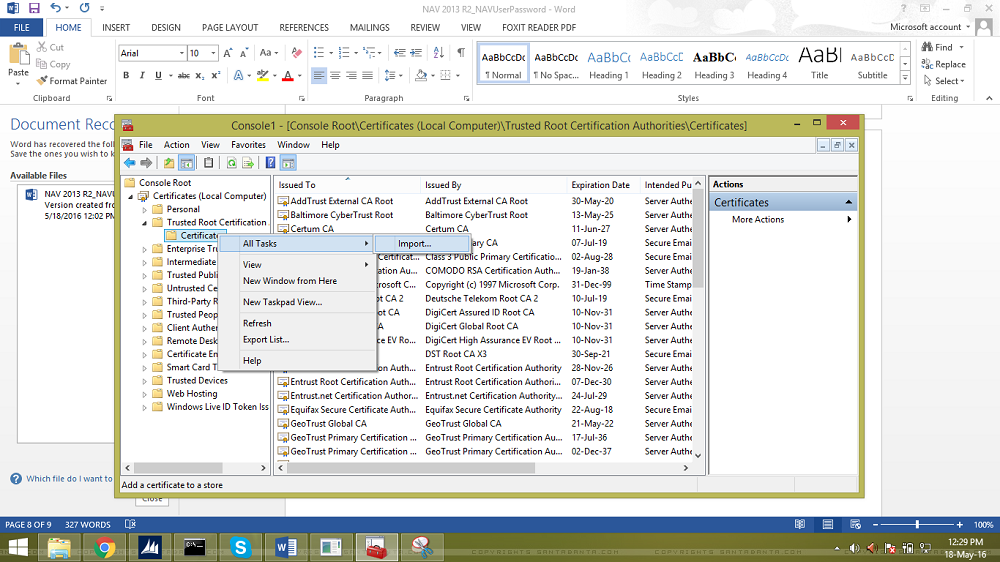
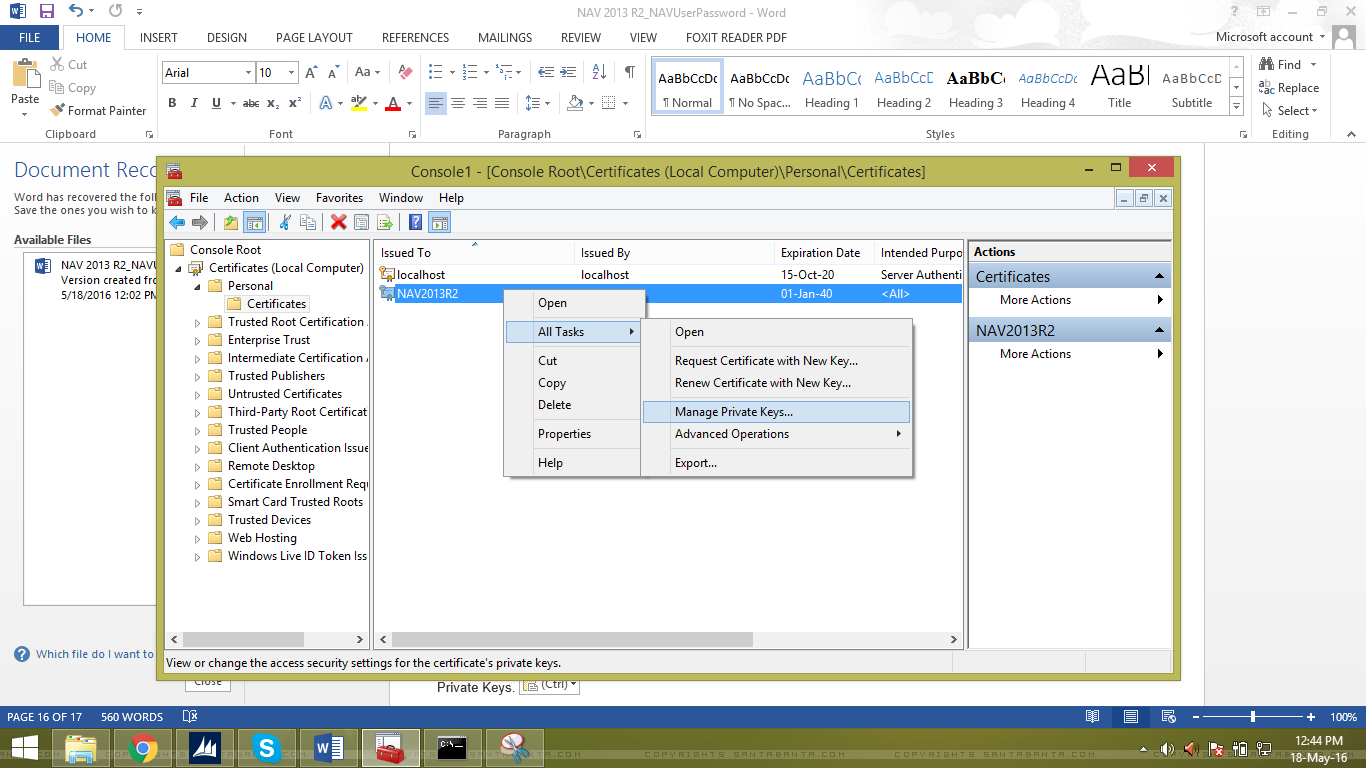
20. Right Click and Select All Tasks and then select Import.


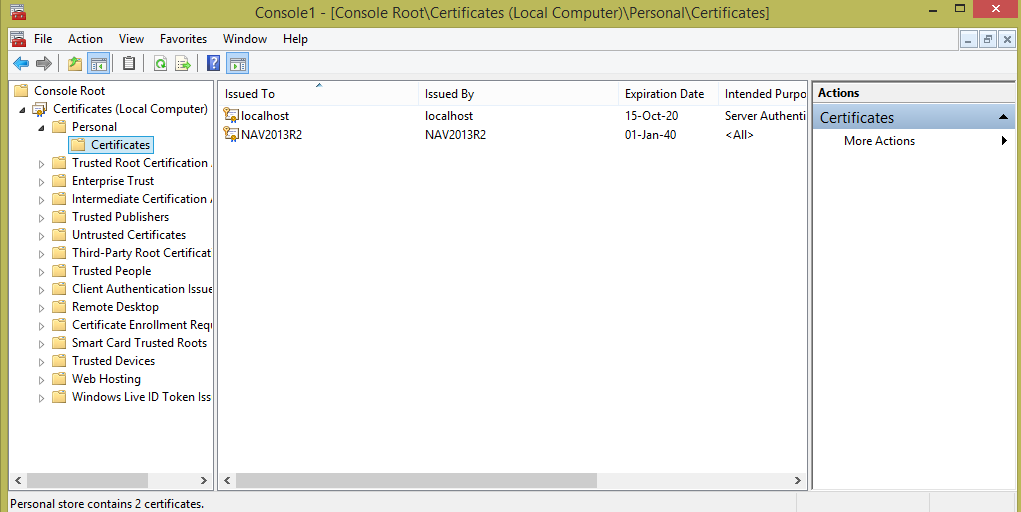
makecert -sk NAV2013R2 -iv NAV2013R2.pvk -n “CN=NAV2013R2” -ic NAV2013R2.cer -sr localmachine -ss my -sky exchange -pe NAV2013R2.cer
This command specifies the subject’s certificate name as NAV2013R2. You need this certificate name when you configure the Microsoft Dynamics NAV Windows client or Microsoft Dynamics NAV Web Server components.

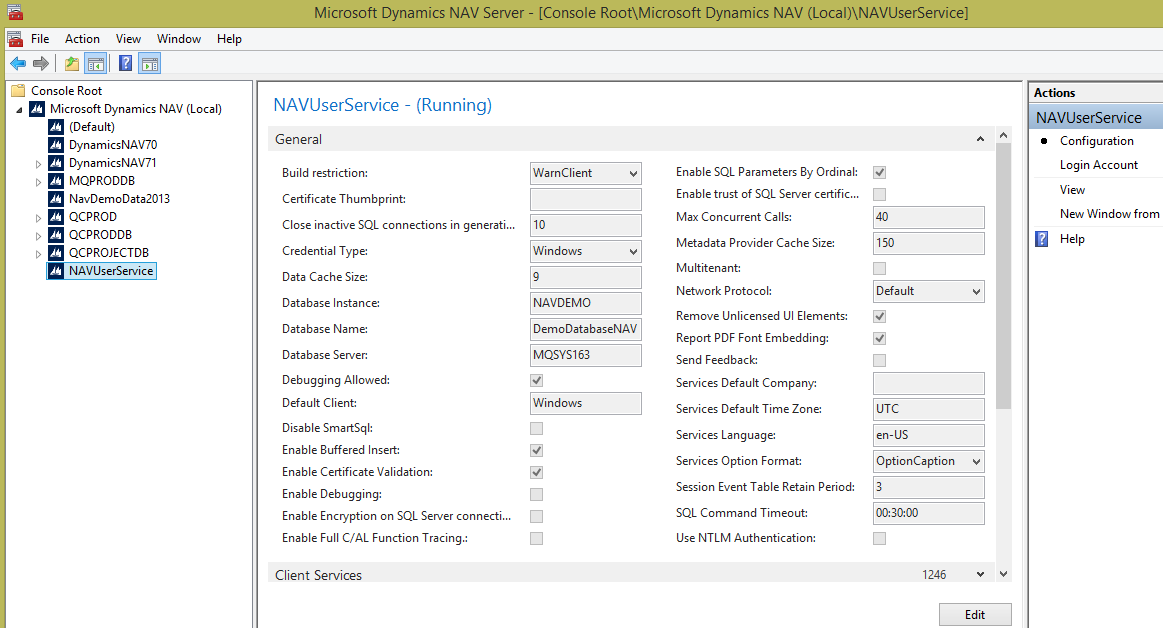
Part 3. Configuring the Credential Type for Microsoft Dynamics NAV Server.
For New Services i.e NAVUserService following Port Numbers are used (We will require these Port During Configuration of Clients)-
Management Services port – 1245
Client Services Port – 1246
SOAP Services Port – 1247
OData Services Port – 1248
38.Edit the Service and change –
a) Credential Type to NavUserPassword.
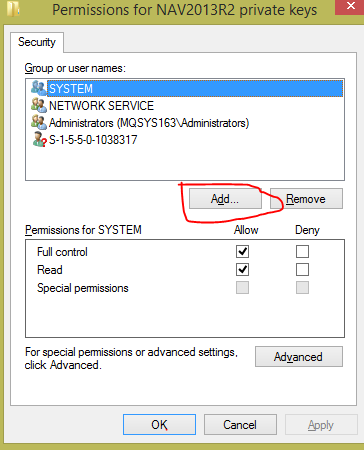
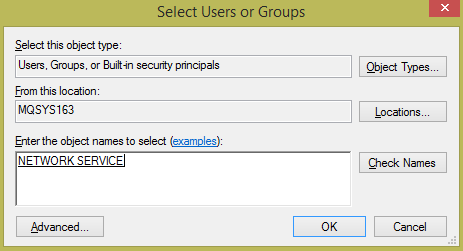
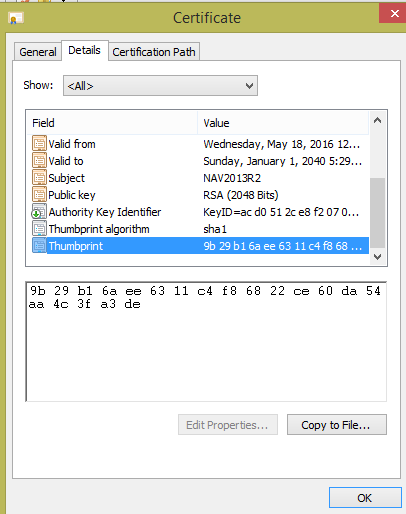
b) Certificate Thumbprint
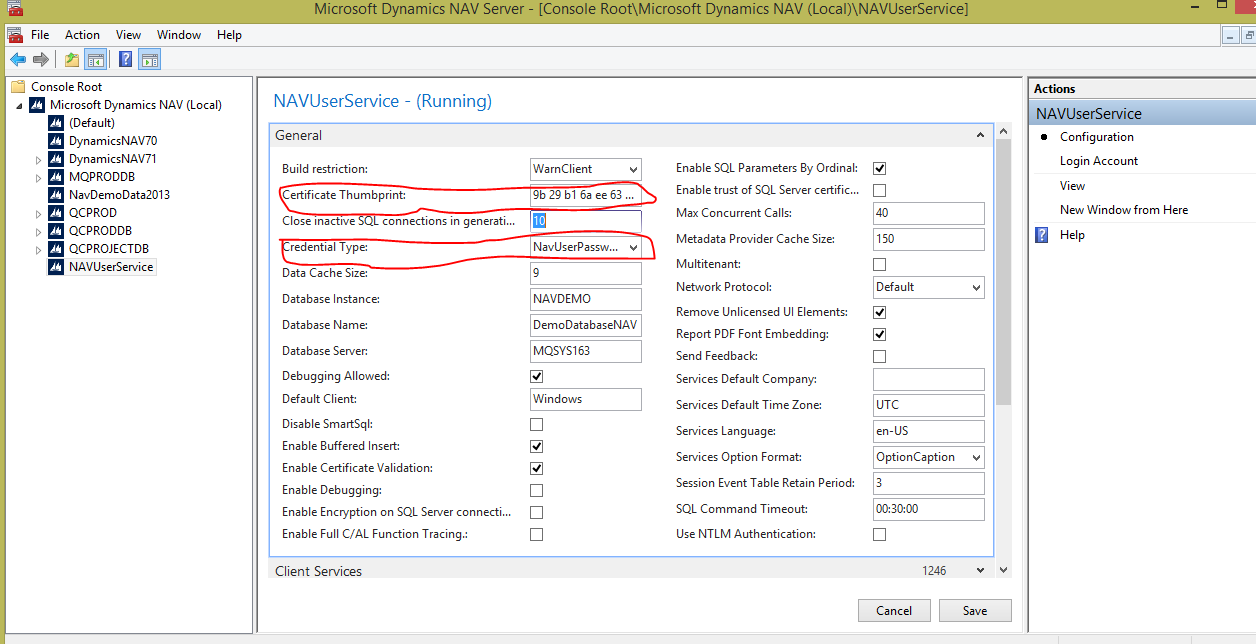
39. Save and Restart the Service.
40. It should be up and Running
Part 4. Configuring the Credential Type on the Microsoft Dynamics NAV Client.
Windows / RTC Client –
I will explain this you all in a separate post, as of now just follow the steps as shown below –
1. Navigate to C:\Users\<UserName>\AppData\Roaming\Microsoft\Microsoft Dynamics NAV\71
2. Copy the File ClientUserSetting to NAVUser Certificate Folder Which we newly created.
3. Open the copied file and do changes for these parameters as shown below.
Port No. – New Service Port No (in my case 1246)
Server Instance – New Service Name (in my case NAVUserService)
Client Service Credential Type – NAVUSerPassword.
DnsIdentity – Certificate Name (in my case NAV2013R2)
UnknownSpnHint – New Serivce URL (in my case localhost:1246/NAVUserService/Service)
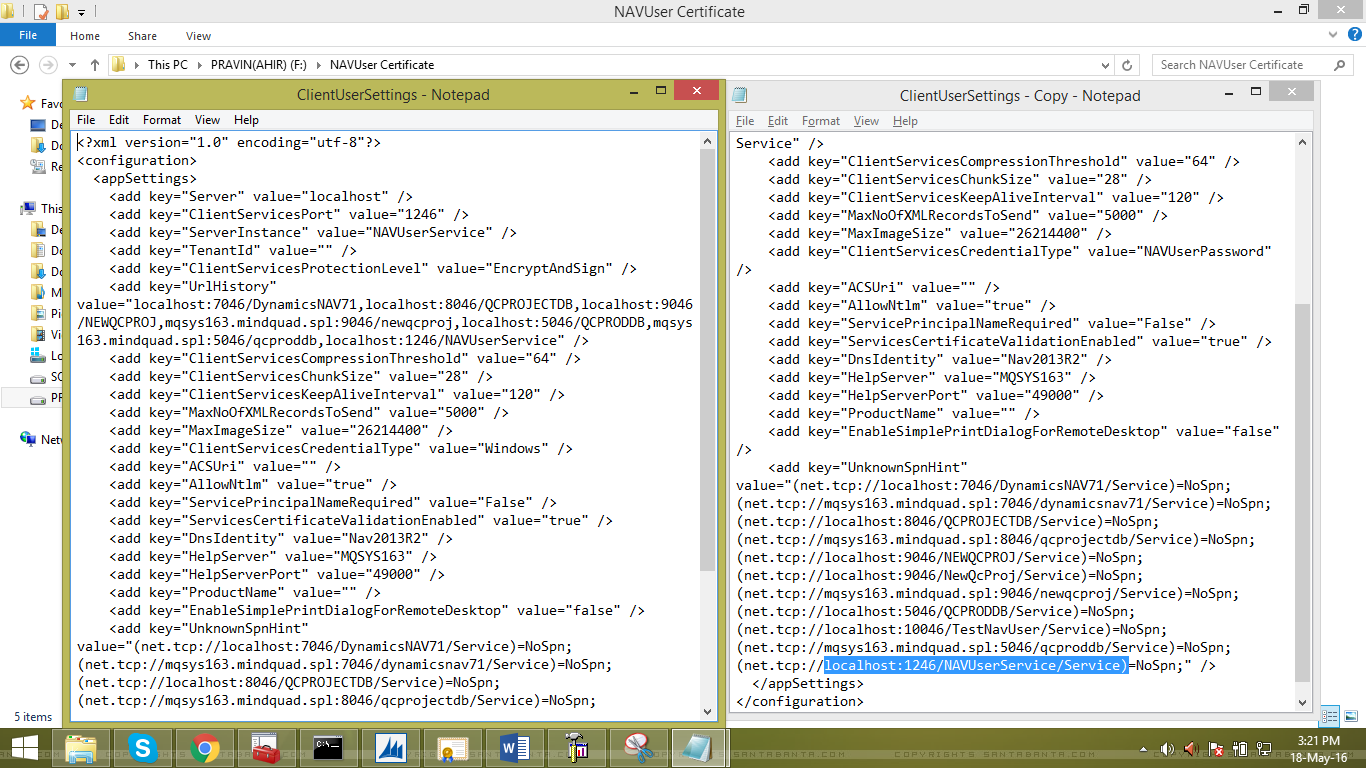
4.Save the File.
5.Create a Shortcut of NAV 2013 R2 Windows Client on Desktop and Naviagte to its properties.
6. You will see below URL in the Target Property of Shortcut.
“C:\Program Files (x86)\Microsoft Dynamics NAV\71\RoleTailored Client\Microsoft.Dynamics.Nav.Client.exe”
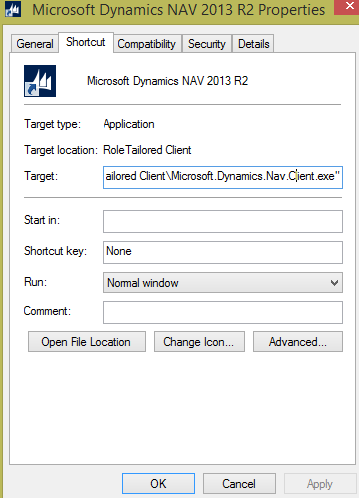
7. Append this with the address of settings file that you have updated in step 3.
“C:\Program Files (x86)\Microsoft Dynamics NAV\71\RoleTailored Client\Microsoft.Dynamics.Nav.Client.exe” – To –settings:”F:\NAVUser Certificate\ClientUserSettings.config”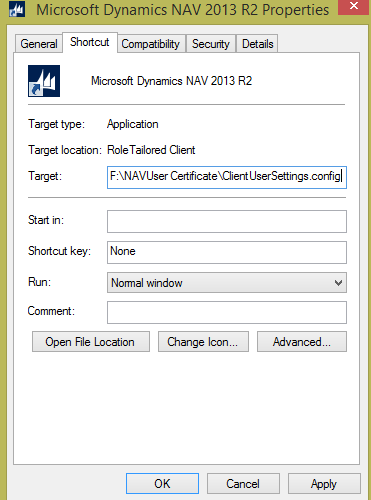
8.Hit Apply and ok.
9. Run the windows client, if all the steps are performed correctly you should end up with a window as shown below.